Table of Contents
Download GET Mobile
Step 1:
A new user would first find the GET Mobile app on their phone's app store and install it if they have not already.

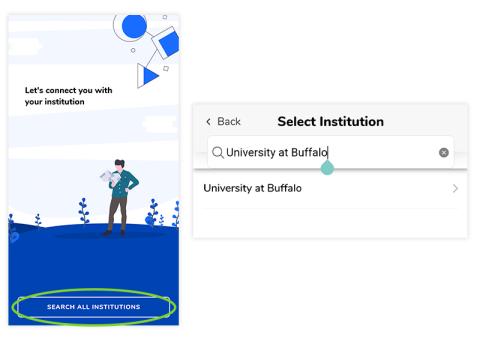
Step 2:
Click the Search All Institutions button and search for "University at Buffalo." Click it once it pops up.
Account Creation & Login
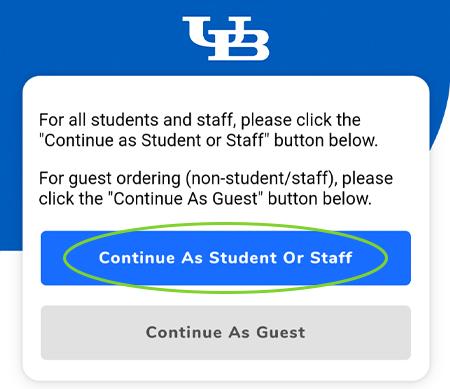
Step 3:
A pre-login welcome screen will pop up asking the new user whether they are UB Student/Staff or a Guest. Click the Continue as Student or Staff button.
Step 4:
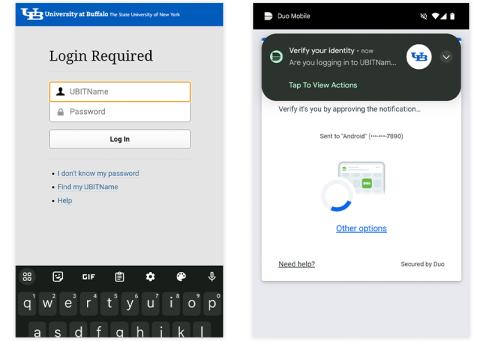
Shibboleth log in, and Duo authenticate if needed, with your email and password.
If you're a first time GET user, you will receive a verification email and can click the confirmation link within it. You'll then be taken to a confirmation page once the account is verified.
Go back to GET, and Shibboleth log in with your email and password once again, and Duo authenticate.
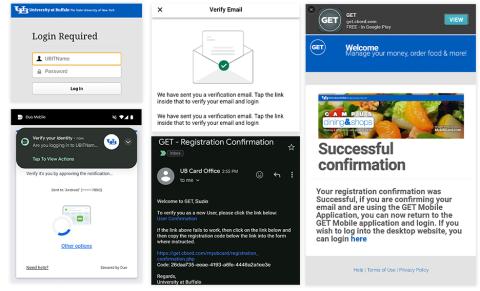
If you're a returning GET user, Shibboleth log in with your email and password, and Duo authenticate.
Step 5:
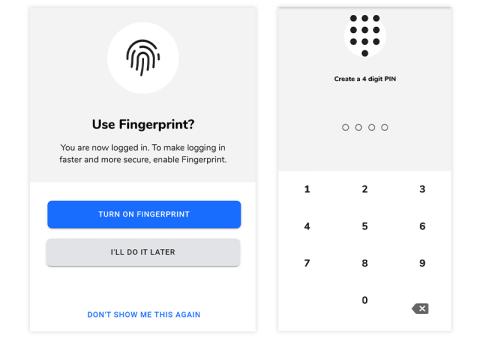
For future logins, you'll need to set up a Fingerprint unlock and a PIN number. Fingerprint unlock is not required, but a PIN number is required, so be sure to remember what you set up.
Step 6:
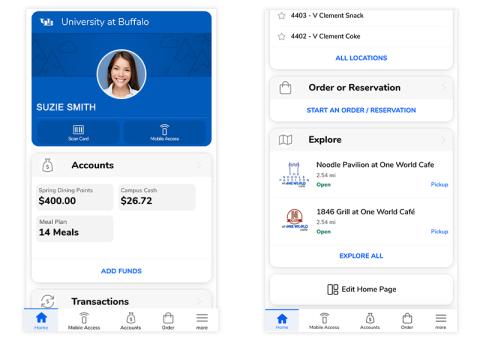
You're now logged into GET and are brought to the homepage. Here is where you can view your meal plan balances, add funds, make vending purchases, and order food from select on-campus locations with your meal plan.
Order with Your Meal Plan
Step 10:
You can now start ordering food with GET by one of many ways:
- Scroll down on the homepage, and press the Start an Order/Reservation button in the "Order or Reservation" section.
- View any nearby currently open merchants in the Explore section and click one of them, or the Explore All button.
- Press the Order button at the bottom of the app to view all currently open merchants.

Step 11:
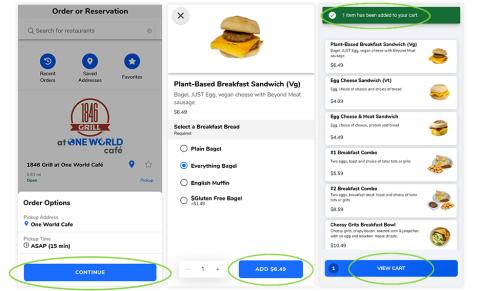
We'll use 1846 Grill at OWC as an example. Let's order a Plant-Based Breakfast Sandwich.
Select a breakfast bread, click the Add button at the bottom right, and then click the View Cart button at the bottom of the menu screen afterward to pay using a meal plan.
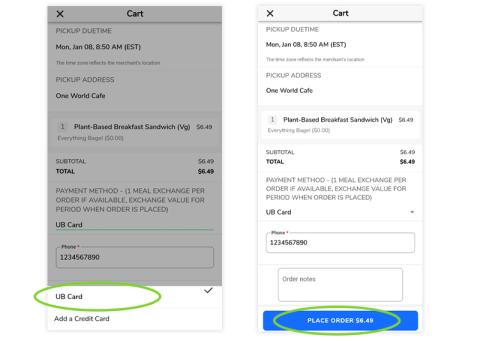
Step 12:
When you view your Cart and review your order, under Payment Method, you can click the drop down and select your meal plan.
For Students, choosing UB Card will take a meal swipe from your meal plan first, then funds from your other applicable accounts like Dining Points and Campus Cash.
For Faculty & Staff, choosing UB Card will take funds from your staff meal plan first if applicable, then FlexiBULL Bucks.
Then press the Place Order button to send your order to the restaurant.
Add Funds
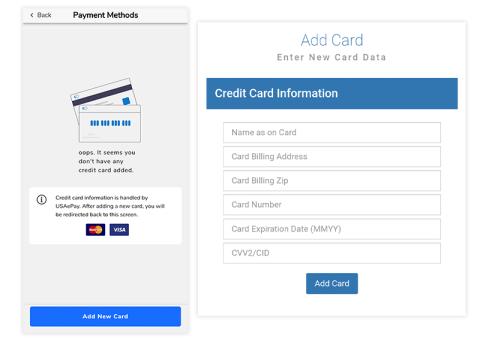
If you'd like to add funds to your Campus Cash with a credit card or by billing your student account, click on the Add Funds button on the homepage. Or after clicking the More button at the bottom of the app, click Settings and find Payment Methods.
This is where you can add a credit card, or bill your student account with the Bill Me option.
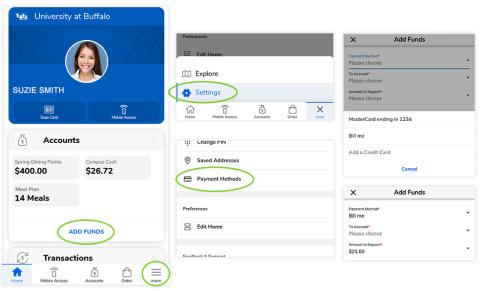
Once you press the Add Card button after you input your credit card information, it will show up as a Payment Method option on the dropdown when you make an order with GET.